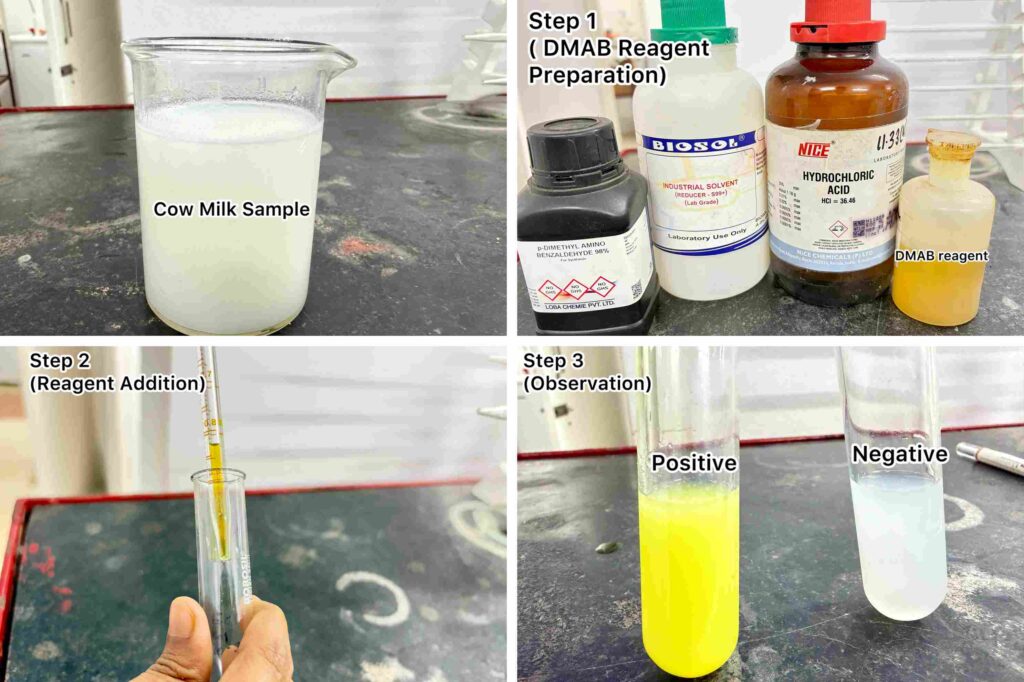
Added Urea detection Process in Milk Sample in our lab
Milk is rich in proteins, fat, lactose, vitamins, and minerals. However, due to increasing demand, milk adulteration has become a significant problem. One typical adulterant is urea, unlawfully added to milk to raise its protein content by increasing viscosity also match with natural solids-not-fat (SNF) level.Very small levels of urea are naturally found in milk […]
Added Urea detection Process in Milk Sample in our lab Read More »